How To Take Better Winter Pictures
Winter mornings are not exactly fun, especially if you commute. The doorstep is slippery, your hands are cold and you have to spend ages scraping the ice away from the windshield if you want to get anywhere.
It’s not the worst thing in the world, though. Yes, your car might be frozen over and your credit card nearly grated to oblivion, but at least the world around you has just got a whole lot prettier.
The winter season is one of the most beautiful times of the year. Full of gorgeously lit streets, frostbitten woodlands and – best of all – snow. It is also a great time for all the photo book lovers out there.
Winter themed photo books are guaranteed to be stunning. Not to mention, #snow was one of the top social media trends in December 2021. So not only can you build up a winter portfolio for a Facebook and Instagram photo book, but you can also gain a few more snow-loving followers whilst you’re doing it!
But how do you take good snow photographs? Well, not easily. The art of good winter photographs can prove to be elusive to even some of the best photographers, so here are a few tricks – some practical and some technical – that can help you achieve a good collection:
For Goodness Sake, Buy Some Touch-Screen Gloves!
Practical point first: how many times have you tried to take a picture out in the winter, only for the fabric of your gloves to get in the way? You have to put your phone back in your pocket, remove one glove, stuff it under your armpit and go all over again.
By that time, the scene you’re trying to photograph may have completely changed. Touch-screen gloves can cut off that problem at the source, and ensure you take winter-themed photographs without any hassle or chilly fingers!
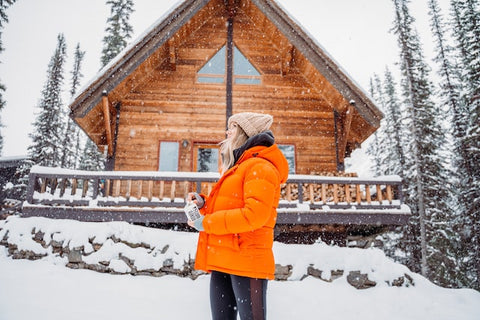
If You’re Taking Pictures With A Friend, Bring Along Some Colour
Some of the best winter photographs have something in the frame as a subject. This is because, although snow is very beautiful, it is pretty plain as far as photographs are concerned. You have a white background, a white foreground and not really much else, so it’s important to actually show the effect of the snow with something to contrast.
If you’re photographing your friend in the snow, for instance, you should bring along a piece of clothing that pops. That can be a colourful, woolly hat, a thick red coat, or even a pair of bright boots that will stand out against all the white. This will also be good when using a photo book maker. It’s all very well having a number of landscape shots, but for a photo book, these can get dull pretty quick. Including people and subjects can help to balance out your book and put more emphasis on the really good landscape pics.
Photography Is All About Timing
Any photographer will understand the importance of timing. Some scenes look good at specific times of the day, some scenes will end up looking worse, and this is no different when it comes to winter photography.
Just as you would if you were trying to photograph rain, shooting in the morning will give you the best chance of some colour contrast and a glisten to the atmosphere. Winter mornings tend to begin with blue skies and grow more overcast over the course of the day, not to mention the sun will give a snow-y scene some sparkle.
Increase Your Exposure And Correct Your White Balance
The problem with winter photography – as mentioned in the last point – is that the days are normally always overcast. If, for whatever reason, you cannot get up early to take some morning photographs, this leaves you with a bit of a problem. A snowy scene shot on a cloudy day is going to be dark and – sometimes – blue. This is because the whiteness produces a reflection effect and reduces the contrast and gradation of your phone’s camera.
In terms of dark scenes, this can be alleviated by increasing your exposure, which will push the light of the scene and make it brighter. Meanwhile, if you’re concerned that your snow pictures look blue, then this can be solved by quickly removing your phone and then returning it to focus. If this doesn’t work, then going to “settings” and customising the white balance function to “cloudy white balance” can allow you to get far closer to an accurate image.
Footprints Are Utilised For A Reason
Once again, many photographers will be aware of “lines”. These are used in photography to grip the viewer’s attention and lead their eyes through the scene itself. This is why footprints are often used in winter photography.
Yes, they’re pretty and interesting to look at, but they’re also there for a very technical reason. Finding footprints – or a fence or brick wall – can give you this straight line and lead the viewer either vertically or horizontally through the picture you are taking.
Slow It Down To Win The Race
Last of all, the big one. The crème de la crème of winter photography: snow. No photo book or Instagram profile can be complete without a few snow pics, but out of the millions of #snow images on Instagram last year, it’s likely that not many were that good. This is because our phone shutter speeds make it incredibly difficult to actually capture snow falling. If you’re trying to achieve the effect of movement in your snow pics, you should play around with your phone's shutter speed.
Slow it down to around 1/60-1/125 seconds. This will illuminate the scene in front of you, as it brings more light through the lens, which can help capture the particles as they fall. If the slow shutter speed makes the snow blur into streaks – a longer shutter speed can do this with fast-moving objects – then slowly crank it up until you have the best of both worlds. Winter photography is all about experimentation, so don’t be afraid to try new things like this to make your portfolio perfect!
